Friday, September 25, 2015

Coffee Lovers Blog Hop - Messy style +GIVEAWAY+

I'm still in the process of moving. Alllllmost done, just one more weekend (at least that's what I keep telling myself...over and over again).


But I couldn't miss out on playing along with the fabulous Amy Tsurata's Coffee Lover's Blog Hop!  So I'm popping in with a quick creation.


Snicker - to make this fun creation I started with a layer of gelatos scribbled on the background. 


Then I smudged the gelatos with my finger, added a layer of stenciled embossing paste (I did a cool tutorial yesterday if you want to learn more about stenciling) and drizzled with Distress Spray Stain to messy it up a little bit. 

My card was totally inspired by the latest Fusion challenge with those pretty colors and beautiful coffee cups! I'm also linking up to the Seize the Birthday challenge - with the toppings to use a die cut (my center panel is a die cut from Winnie and Walter!)


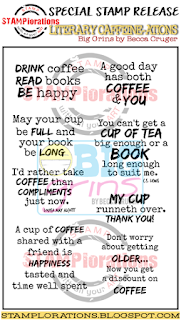
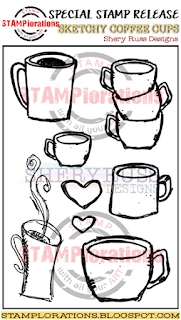
I stamped a sentiment from the arsty Sketchy Coffee Cup stamp set and my very own Literary Caffeine-ations set. 


http://stamplorations.auctivacommerce.com/Literary-Caffeine-ations-Big-Grins-by-Becca-Cruger-P5410822.aspxhttp://stamplorations.auctivacommerce.com/Sketchy-Coffee-Cups-P5410832.aspx

Then I wrapped the sentiment in twine and put it all together. I just love the snarky sentiment!


>>GIVEAWAY ALERT<<

You could win a set of the Literary Caffiene-ations stamps! I've got 2 of them to give away!! Here's how you do it:
>Follow my blog
>Let me know in the comments that you'd like to win!

I'll do a random draw once the hop is over. Please leave your email address so that I have a way to contact you!

Thursday, September 24, 2015

The BS Sessions - A Stenciling Tutorial

Welcome, Friendly Friends to the very 
first episode of the BS Sessions!


What are the BS Sessions? Well Samantha knows how to work a marker like nobody's business and Becca loves to get messy with mixed media. We both wanted to learn the other person's crafty secrets so we're going to ask one another a question on the last Thursday of the month. Becca will provide you with some amazing Mixed Media techniques and Samantha will show you some tips and tricks about coloring! We'll both provide our followers with a little tutorial, because if we have these questions - our followers might too!

----------
Which brings me to this month's question, asked by Sammy:

How do you get your stencils to create such clean 

lines with no bleeding?

Well now, this poses a conundrum because I usually just do a bunch of messy junk on my cards and I wasn't aware that I produced clean lines. ;) 

Hah!

But seriously, there are a couple of tricks to using a stencil and getting the result you want. I'm going to take you through 3 different types of mediums and how to get a *kinda* clean line. 

>>>>Stencils and Sponging with Distress Inks<<<<

So these tips really will work with any type of ink. I just said Distress Inks because, well, Damsel of Distressed... ya know?


First of all, I think this photo is wicked cool. The design lines are TOTALLY going to inspire a card in the future. 

Step one of getting a good impression from stencil and sponging: TAPE IT DOWN!

 For this, I like to use washi tape that I don't like very much because it's repositionable and won't rip my cardstock when I remove it.  You will notice that I have two different rings of tape, one that's holding each side of my stencil down, and then another that's keeping my cardstock in place. That's because if you only tape down one, and the other still is movable, you're not going to get clean lines. 


Step 2 - Be gentle but firm

 Rub your sponge in soft circles, and always start from an edge/off the paper. That way you won't get weird stop/start lines. Use your free hand to hold the stencil down - moving your hand as you go along. If you rub too hard, you're likely to tear the stencil. If you rub too soft, you're likely to not get a good amount of ink onto the paper. Practice until you get a feel for it. 

At this point, you could lift up your stencil and you'd have a nice impression. If you're sponging, I'd recommend wiping your hands on a wet towel, then peeling so that you don't accidentally get ink onto the white space. 

For me, I added another layer to this.

>>>>Stencils and Embossing Paste<<<<


I kept the stencil positioned, exactly like I had it. 

So Step 1 - TAPE IT DOWN! 

Step 2 - Use a Palette Knife to Spread


Using a palette knife is the easiest way to pick up a good amount of texture paste, and then spread it over your surface. You want enough to cover the whole opening, and you can add more as you go along so don't grab a huge glob at first. 

Different brands of texture paste have different consistencies. I really like the Ranger Art or Wendi Vecchi brands, myself but I've tried Dreamweaver brands and that is nice, as well. Texture paste usually has the consistency of shaving cream and is fairly easy to manipulate.

There are many different colors of texture paste. Here, I'm using a translucent/transparent version. It had a slightly jelly-like consistency. 

Step 3 - Smooth it with the Flat End of the Palette Knife


Here it is all smoothed out. You can see that there is not many bumps and lumps in mine. If you want bumps and lumps, feel free to vary the pressure of the palette knife as you're smoothing and leave some areas with thicker paste and some areas with thinner paste. 

Step 4 - Remove the Tape and Peel Back Carefully


Voila! Clean lines! Again, it's important to clean your hands before you peel back the stencil to help your chances of being smudge-free!

Another tip for texture paste, If you DO get some out of the lines - don't worry. Clean your palette knife and use it to remove the excess paste. It usually will come right off. But do it quickly - some brands of texture paste can dry very fast.


>>>>Stencils and Distress Spray Stains<<<<

Again - this could be any type of spray stain, really. I just only own Distress Spray Stains.

I started this background by sponging in 3 layers of Distress Inks to create a color blend. 


ooooo- purty!

Then repeat 

Step 1 - Tape it Down!! (are you getting the hint yet)


Step 2 - Spray your Ink then Dab with Paper Towel


Here's the deal folks, I'm sorry to break it to you but I don't really think there is a way to get CLEAN lines by using sprays and stencils. (maybe some other crafty magical genius can overrule me on this)

But there are a few tricks to getting CLEANER lines. - Dabbing up the excess with a paper towel helps to prevent seepage when you remove the stencil. You want to do this as quickly as possible. 

Step 3 - Use a pen in a matching color to define lines


I bet you can tell which triangles I traced around! Here I'm using a Faber Castell Pitt Artist pen to go around the edges.  It's a little time consuming, but that's the only real way to get semi-clean lines that I know of with this type of medium.


So there you have it Sammy! I hope this answered some of your questions! :) 

I bet my readers are curious what question I asked Sammy! It is:

How do you blend skin tones so easily?


Pop over to her blog (Designs by Sammy) for a tutorial on blending skin tones!

Monday, September 21, 2015

Taking a Tiny Bloggy Break - and a New Craft Room!

As many of you probably have surmised, I have died. 

Just kidding - I've been missing from the blogosphere for a little bit and I KNOW that you haven't seen me commenting on your blogs, as per usual. 

I have not died, I actually am in the process of moving. Sigh*
I'm just moving 5 blocks over, but all the work is still the same. I have one post scheduled for this Friday, but other than that, I'll probably be MIA until all these boxes are packed, moved, unpacked and everything is CLEAN at both places. 


Have I said, Sigh*, yet?


Anyhow, I did manage to move my craft room last night and I'll leave you with these photos of my new studio! 


The whole shebang! All put together, with my own artwork adorning the walls! (thank you panoramic setting)


The desk, where the magic happens! Patterned paper down below, cardstock up above and stamps sorted into bins! Along with some cards from crafty friends living up top! 


The Cricut/Printer station and the Embossing Station (dry and wet!)


 OOoooo - a mixed media shelf thingamob (I found the shelf at a rummage sale - it's an insert for a medicine cabinet) Front side holds Distress Spray Stains and texture pastes, back side holds Distress Paints and gesso/mod podge.


My coloring station/close up of my work space. 


My window of cards sent to me by blog followers/crafty friends from all around the world! I definitely feel blessed every time I look at this window and it will be fun to change it out with the seasons! 


So anyhow, this is what I've been up to, if you've been wondering. I'll be back in full force on October 1st to start the Hop to Stop

https://www.facebook.com/events/878768925510975/

Wednesday, September 16, 2015

Thankful for Autumn - Special Release +GIVEAWAY

Well, the birdsong is beginning to fade, crispness descends on the morning air, and apples are falling from trees one by one - ready to be made into all sorts of yummy treats - it must be Fall! At least in this neck of the woods.

I, for one, LOVE fall. So I was super excited when Shery at STAMPlorations said she was going to release an Autumn-themed stamp set because, if Fall is good then Fall cards are better. They can be SO beautiful with all their rich reds and warm yellows. 

And that's exactly the kind of colors I wanted to pull in to my design, so I got out my Spectrum Noir reds and golds and set to work. 


There are so many fun stamps in this Thankful for Autumn set!


Here's my final product. I used some graphic chevrons and some rustic-looking fruit crate paper along with some red hemp twine. 


This card was inspired by the sketch over at the Sweet Sunday Sketch and am also sending it over to Addicted to Stamps - Autumn challenge. 


Hey! Do you want to win this cute Autumn stamp set?! Well there is a GIVEAWAY! Just go stop by the STAMPlorations blog to see how you can win it! 

--------------------------------------

While I'm at it - I might as well give you all a gentle reminder that you can still play along in the STAMPlorations September challenge (you can use ANY stamps to play along - it doesn't have to be STAMPlorations brand to win!)

We have a theme and a sketch. You can choose to use one or the other OR both!


For my reminder card, I chose just to focus on the music theme. I used some patterned paper that had the lyrics to Happy Birthday. I added some fun mixed media elements, like a crocheted doily, spray splatters, metal pieces and acetate sentiments. 


I colored the daisy from the Bloom Sketches set with some scribbled on gelatos and smudged it around with my fingers. It's so pretty and joyful and I just love it. Sorry about the camera angle - you totally can't read the YOUR day sentiment fully. Woops! 

This is going over to play along in the Seize the Birthday - Anything Goes challenge and Love to Create - Anything Mixed Media Goes.

Come play along with us! The STAMPlorations challenge is open until the end o' the month!


One last thing before I go - you probably have noticed a lack of crafty comments on my end (I feel so bad!) But it is a necessary evil as I am packing up my entire house for a move at the end of this month. Please send all your good thoughts, prayers and love because I don't want to be bald and I feel like I'm pulling out all my hair! I. HATE! Boxes! ;) 

Thanks for your patience during this time! 

Friday, September 11, 2015

Featured Friday - Samantha Aguilera!!

Happy Featured Friday Folks, it's that fine time of the month where I get to spread around some bloggy love and showcase a blogger who's inspired me in some way.


Today's star designer is brought to you by the letter S for:


Although my style tends to be more mixed media-y, I admire designers for a host of different reasons. These FF segments have seen cardmakers who focus on shabby chic, masking masterminds, and yes - even clean and simple.

That's because even if I'm not particularly good at creating in that aesthetic, I still drool over well-designed cards in any style. And Featured Fridays are a GREAT way to get me outside of my comfort zone.

And that's where Samantha comes in. We "met" when she asked me to be a part of the Crafty Gals Design Team (which I served a term on). I always drooled over Sammy's ability to create fancy fold cards, but her greatest skill (in my opinion) is coloring. Holeeee snapdragons can this girl color!

By why let me tell you all about her, when she can do that herself? Here's 7 things you should know about Samantha:


1. How did you get your start in card making?

My mom is actually the one who got me started! In December of 2009 I got a Cricut and I have just expanded from there. I've always been into crafty things though. Before I was into card making, I use to paint and scrapbook as well.


2. You're an amazing colorist! Have any tips for people interested in learning to color like you?

I invested in some of the Kit & Clowder technique classes and those are worth every penny! I feel like those classes defintely help me perfect some of my coloring techniques and I've learned so many new ones along the way as well. The biggest tip, I would have to say though is PRACTICE!


3. If you could buy any craft supply/product right now, what would it be?

A MISTI! I've been eyeballing that thing out for a while now. I have a couple stamp sets that are meant to be layered and with MISTI it looks like it would be a breeze.


4. If you were a color, what color would you be and why?

I would have to say Magenta. First off it's my favorite color, second off I love how fun, loud, and pretty it is!


5. What are your favorite card making challenges?

I'm completely biased but Crafty Gals Corner (which I run for those of you who didn't know) is one of my favorites! I also really like Faery Ink, Scrapper's Delights, Sassy Studio Designs. Some of those are blog challenges but nevertheless - still fun!


6. How do you stay organized?

I attribute a lot of that to my need for organization. My craftroom has to be oragnized, I'm a little OCD about it. Every box is labeled with what it's side, things are alphabetized, color coded, etc. My dies and stamps are in Stamping Up! Storage boxes and are colored coded by occasion. I can't stand not being able to find something - so with this crazy organized way I hardly ever loose anything.


7. What is your best advice for new bloggers?

Explore other people's blogs, find some inspiration, and show us what you got!

-----------------------------------------

I just got a MISTI and, although I haven't had much time to test it out, I can tell it's going to be amazing! 

For those of you who haven't seen a Featured Friday before, it's all about CASEing. I'll find one creation on the featuree's blog that made me fall in love, and then we BOTH get to CASE the creation! 

THE ORIGINAL


Oh my goodness golly - this card is actually displayed in my dining room right now because Samantha sent it to me for my birthday. I was BLOWN AWAY. That gorgeously colored ombre hair, the netting, and the pearl "bubbles" It's so creative and something I never would have thought to design!

SAMANTHA'S CASE


MY CASE


So my very first thought was to do  Janna Prosvirina's Oak Fairy

with ombre hair like the awesome Samantha - ummmm yeaaaaahhhhh I'm going to need some practice withthat because, as you can see - this is NOT ombre hair. Snicker*


I forgot how relaxing coloring could be!! I colored this girl up with a whole HOST of Spectrum Noir Markers. ANNND! After one rather unsuccessful attempt at scoring, I fancy folded! *Takes bow* Taaa daaaa! So thank you Samantha, for pushing me out of my comfort zone because I LOVE what I created! 

I'm sending this gal over to:
Crafty Gals Corner - Bingo Challenge (I chose the middle row down - ribbon, colored digi, sentiment)
Aud Sentiments - ATG + a sentiment
One Sweet Challenge - Anything Goes using Sweet Pea Stamps
Darnell's NBUS - Everything on this card is new. I won this digi stamp back in March and haven't used it yet - woops! I also used some brand new May Arts adhesive ribbon, and the wooden chippies have been idling in my drawer, too. 


-----------------------------------------

Pssssssssssssssssssstttt: Here's special sneaky peeky for my bloggy followers - As we were going through the conversation for Featured Friday, Samantha said "Gosh, I love what you do with mixed media." and I gushed "Thanks! But I WISH I could do what you do with coloring." and so an idea curdled in our brains. 

So on the last Thursday of the month we'll be bringing you


The BS Sessions! Basically, I'll ask Sammy one question about coloring, and SHE will ask me one question about mixed media. And then we'll share tutorials on our blog. The first BS Sessions will be held September 4th! Stay tuned!

PLEASE - if you could spare a minute of your day would you mind popping by Sammy's blog and telling her hello? I'm sure it would make her day!

Tuesday, September 8, 2015

Love is in the Air - Crazy Bird Style

Love love love. September is usually the month when I reflect upon love, because the 15th is my anniversary to my wonderful boyfriend. 

Today, I'm going to show off the card that I made for him using the Crazy Birds stamp set. 


I just love these stinkin' birds. They are so expressive and I keep seeing crazier and crazier cards with them. Especially now that there's an expansion pack with fun accessories. 

I've not got to use the bird before and so they are perfect for Miss Darnell's NBUS challenge. What's NBUS, you ask? Well I will counter your question with one of my one: WHAT ROCK HAVE YOU BEEN LIVING UNDER?! It's only the coolest challenge this side of the interwebs. It stands for Never Been Used Schtuff and it gives you incentive to use that crafty thingamabob you've been hoarding. 


You can find all of the details and the awesome list of sponsors over on Darnell's blog

Here is my full card:


I colored these critters with some Copic markers and then I added a 3D heart sticker (also NBUS) before "stitching the whole thing with a Pitt Artist Pen. 

Did you notice that I masked the birds so their beaks were touching? They're kissing, of course! ;) 

And then for the sentiment: As many of you know, I may be a bit *ahem* quirky, crazy, funky, silly... So this seemed like the perfect way to say HEY! It's me! And I love you! 

I'm also sending this over to the Craft Stamper Magazine Take it Make it Challenge - Anything Goes and Little Red Wagon Challenge - Clean and Simple.

We just spent the weekend up on Minnesota's North Shore celebrating. :) 


Thanks for popping by!!

Friday, September 4, 2015

Discover CAS - STAMPlorations Sketch and Theme Challenge

First of all. Ho. My. Gooot-ness. 

You all are >>AMAZING<<. Seriously. My heart is overflowing with joy after all the LOVELY comments you left on my last post, introducing my own stamp line. 

Thank you. <-- that seems so insufficient, but I truly, truly mean it. I'll be getting around to leaving you all replies shortly. 

Today, however, is a new day. And that means a new post. STAMPlorations is starting their monthly challenge. We've switched things up at the challenge and we're now doing a theme and sketch combo. You can choose to use either the sketch OR the theme OR both.  And the great thing is, you can use ANY products that you want to participate!


The theme is Stamps and Music and the sketch is funky cool. 

For my design team project, I just chose to use the sketch. And folks, it was interesting. Lining things up perfectly is NOT my strong suit. And this has a whole lotta lining up. All you CASxperts out there have some genius magic in you, that's all I'm saying.

Here's my card:


I used one of the new stamp sets, which has some beautiful typography and is perfect for cardmaking or art journaling. This set is called BOLD SENTIMENTS: Discover. The goal was to leave everything black and white, but then I just felt like the JOY needed to jump off the page, so red it was. And then, since I couldn't leave it QUITE as bare as I wanted to, I had to stamp some chevrons from the Mixed Media Grunge set. 

My card was very heavily inspired by the PINspirational challenge image and also fits nicely with the AAA Cards challenge, which is to use embossing. ALL the words on this card are heat embossed. Last, but certainly not least, I'm going to send it over to House of Cards for their Stitching challenge.

https://www.pinterest.com/pin/141581982012684533/

As for you, go check out the STAMPlorations challenge!
We've got some AWESOME prizes! 

------------------------------------------

Now. For one last thing. As many of you who are my facebook friends already know, I'm putting on a blog hop October 1-14 right here, at my place. It's called the Hop to Stop and you can read all about it and get more information on the 

 https://www.facebook.com/events/878768925510975/

October is National Domestic Violence Awareness Month and this hop is designed to raise awareness about domestic violence, an issue that impacts 1 in 4 women, and the resources that are available to assist victims of domestic violence.

A linkup for the hop will be posted on October 1 and will close October 14. Prize winners will be announced October 17.

Any type of papercraft/mixed media art project is welcome, as long as it *features* the color purple (domestic violence awareness color).

There are TONS of amazing sponsors for this blog hop, so you don't want to miss out!

For more information about domestic violence, its impacts, and available resources, visit the National Resource Center on Domestic Violence. http://www.nrcdv.org/